Wednesday, December 26, 2012

Portrait Canvas Tutorial


Portrait canvas tutorial is finally here!  It's pretty cheap and easy so I recommend this to anyone! 


You will need: canvas, Liquitex gel (I use the medium kind), foam or bristel brush, laser print of your image, and spray bottle filled with water.

This part is VERY important.  Your image HAS to be a laser print (not inkjet or any photo paper either).  Laser prints can be done at Staples, and an 8x10 is about 50 cents.  The largest size they can print is I believe 11x14.  ALSO, make sure you flip your image before printing it. It will be reversed again to its proper layout when it's applied to the canvas. So in this picture above, it's flipped horizontally. Got it? Good.

Spread a good amount of Liquitex onto the canvas, and lay the image on top of the canvas face down.  Press down all over (carefully) to get rid of air bubbles. I try to use just my palms when pressing.  I also prefer the foam brush, but it's up to you really.  Within a couple minutes you'll vaguely see the image showing through the paper. But save your excitement! You still have to wait a good 4-6 hours for it to dry (or overnight).


 Once it's 100% dry, it's time for the fun part!  Get your spray bottle with water and spray the paper until damp.  (You'll start to see the image a lot more).  You are now going to rub the paper off, leaving the image still settled in the liquitex.

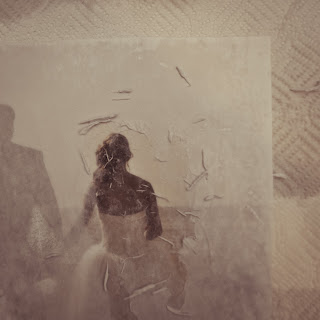
Rub the paper off carefully with your fingers.  Don't worry, if you see this (above) you're doing it right!  Brush off the bits of paper and keep going.


If it looks like this, keep rubbing! There's still paper there, and you may have to spray more water on to help.


 Once all the paper is off and it's dry (again),  spread more liquitex over it for a good top coat.  While it's drying, set it in a safe/clean area.  I usually let it sit around 6 hours, depending on the size.


There you go!  The more canvases you make, the more you'll get a feel for the technique.  I like the "aged" look, with all the imperfections/scratches through out it.  This can also be done on wood the same exact way, so go and experiment!

Wednesday, December 12, 2012

Coming Soon

Some crafts I really want to do sometime soon, and posting tutorials of them of course:

Lace DIY scarf. This will be the big challenge for me because it requires sewing....

....we'll see.


Song lyric wall art


Sharpie mug set


DIY calendar (either Jamie's instagram photos or my own)


Bleached painted shirt


Etched glass cups


A lot of the crafts/ideas I find are from this blog called A Beautiful Mess.  My friend Nicki showed me this site and I fell in love! Theres lots of stuff to look at so check it out!


Ooo la la Ruche!

Another contest you should totes enter!!  Details listed in link:


Tuesday, December 11, 2012

Monday, December 10, 2012

Pinning

It's a Pinterest kind of night, follow my pins at jad0826 and you'll see lots of crafts, wedding stuff, foods, .. and cats.


Wednesday, December 5, 2012

My Fabric Chandelier Version

I finally made this chandelier! Took about 4 hours, but totally worth it. What really got me to make this was my friend Nicki, because she also made it and it looks awesome!~


Here are the steps! :
 You'll need a metal wreath/frame (I chose a circular wreath frame, you can also do square), tons and TONS of fabric/material, such as satin, sheer, lace, ribbon, etc.  You'll need scissors, extension cord (3ft), ceiling hook, lights!, and a needle and thread. (or hot glue gun, which is what I decided to do later).

I would buy at least 10 of these bad boys, it'll go fast!  I chose white and cream colors.

Cut your material in strips.  I made them all around 3 feet long.  Some ribbon will curl on their own (far left), which may be an advantage if you want some curls in your chandelier!  I would recommend cutting some thin (inch-1/2 inch) so that you can spread it around more.

The site that I followed for this used a needle and thread, basically stitching all the material onto the frame.  I soon realized that I have no sewing skills, so I switched to a glue gun.  
'Merca.


To make things a little easier,  temporarily hang up the frame while adding the strands of material onto it.  You might need a stool or chair to reach. Or in my case, I used my bed.

Slap some hot glue on the edge of the ribbon, and place them where ever you desire.  If you have a dark frame and light ribbon, make sure you wrap the ribbon around the wire to cover it.


If you have ribbon with wire in it, fool around with it to give it some shape.

It may look like a fail at first, but don't lose hope! It'll come together in a couple hours.  Just keep adding, molding trimming, aaaaaaaaandd..
BAM! one epic chandelier right in your room.  The lights can be tricky, all you need is one strand of Christmas lights, so try and get a size for a mini Christmas tree.  Depending on the hook you have and the weight of your chandelier, gently bunch the lights up in a lose ball and place them in the middle.  I used some string inside to cradle it up.  The lighter the better!


It's like your own Christmas tree. Only it won't die.  Good Luck! :D


Tuesday, December 4, 2012

Crafts

I finally went and got the supplies I need to make this chandelier! You can't see it too well in this picture, but there's icicle lights inside it.  I also got a circle frame instead of square.  I'm so excited, and I'll post pictures of the process and the final product if you're interested in making it yourself! :)


I will also post the process of making a canvas portrait, whenever I get to making one next :D