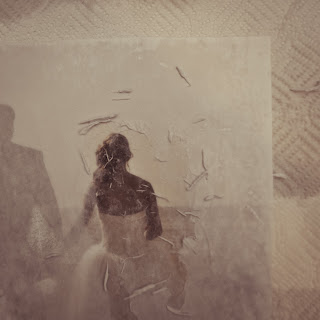
Portrait canvas tutorial is finally here! It's pretty cheap and easy so I recommend this to anyone!
You will need: canvas, Liquitex gel (I use the medium kind), foam or bristel brush, laser print of your image, and spray bottle filled with water.
This part is VERY important. Your image HAS to be a laser print (not inkjet or any photo paper either). Laser prints can be done at Staples, and an 8x10 is about 50 cents. The largest size they can print is I believe 11x14. ALSO, make sure you flip your image before printing it. It will be reversed again to its proper layout when it's applied to the canvas. So in this picture above, it's flipped horizontally. Got it? Good.
Spread a good amount of Liquitex onto the canvas, and lay the image on top of the canvas face down. Press down all over (carefully) to get rid of air bubbles. I try to use just my palms when pressing. I also prefer the foam brush, but it's up to you really. Within a couple minutes you'll vaguely see the image showing through the paper. But save your excitement! You still have to wait a good 4-6 hours for it to dry (or overnight).
Once it's 100% dry, it's time for the fun part! Get your spray bottle with water and spray the paper until damp. (You'll start to see the image a lot more). You are now going to rub the paper off, leaving the image still settled in the liquitex.
Rub the paper off carefully with your fingers. Don't worry, if you see this (above) you're doing it right! Brush off the bits of paper and keep going.
If it looks like this, keep rubbing! There's still paper there, and you may have to spray more water on to help.
Once all the paper is off and it's dry (again), spread more liquitex over it for a good top coat. While it's drying, set it in a safe/clean area. I usually let it sit around 6 hours, depending on the size.
There you go! The more canvases you make, the more you'll get a feel for the technique. I like the "aged" look, with all the imperfections/scratches through out it. This can also be done on wood the same exact way, so go and experiment!


No comments:
Post a Comment